Microscope Camera Adapter Project
Process
Faculty Interview | Defining Problems | Ideation| Prototyping | User Testing
Duration: 4 months
FACULTY iNTERVIEW + Problem definition
The project began with a faculty interview with Dr. McGinnis, a biology professor at Spelman College who was working on an adapter built to hold smartphones above a microscope lense. The 3-D printed tool would allow students to take pictures without the costs or expertise required of a more sophisticated imaging tool. Since he was the expert on the adapter and did the first iterations and tests with students before I was asked to work with him, I interviewed him first to learn about the current prototype’s issues. I identified three main problems after talking to him:
Slippery surfaces - When plugged in, power cords could pull the phone from it’s position or phones would slide while adjusting them on the platform because the surface was far too smooth.
Color correction - Most smartphones had auto color adjustment that would result in an image with strange exposure levels. Trying to adjust this would result in phones sliding away from their proper place.
Platform size - The platform only accommodated small phones with cameras positioned on the left side of their backs.
Ideation
I spent a week studying the existing microscope adapter, showing the tool to three peers and observing how they used it.
Since the target demographic would be non-biology major undergraduates taking biology courses, it was easy to ask a few fellow Spelman colleagues for their opinions. While none of them mentioned color correction, different phone sizes made it difficult for two people to use the adapter. I also noticed all phones slid considerably on the platforms, though less so with rubbery cases. I used what I observed to come up with six main designs with variations for their implementation, from more rubbery surfaces on the platform to sliders that could be adjusted to hold the phone in place. These ideas were presented to Dr. McGinnis for a round of evaluations and brainstorming.
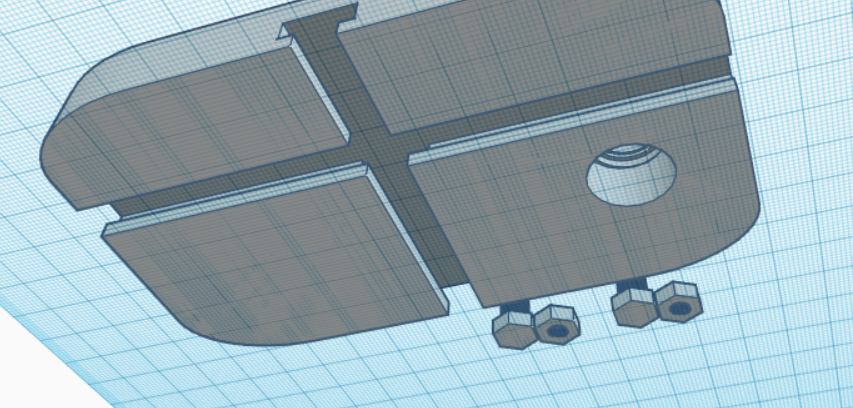
My idea for incorporating sliders seemed to work best and Dr. McGinnis informed me that a good way to test this would be to create t-slots with entrances for a nut and bolt. Once slid into place, the nut and bolt pair could hold the phone in place.
prototype
After creating an .svg file that was laser cut to make a paper prototype of what the final product would look like, I began designing in TinkerCAD and Meshmixer. The following changes were made:
The platform surface area and thickness was increased to accommodate two t-slots
Nut and bolt designs were added to be used for locking the phones into place. (These turned out to be unusable and I replaced them by buying 1 1/2 inch t-slot nuts and bolts)
The lens holder was moved closer to the center to accommodate phones outside of the iPhone 7, which may have different camera placements and larger sizes.
User testing
After getting IRB approval for student testing the final microscope adapter product was tested alongside the original with a convenience sample of 12 students recruited from campus biology courses. The students were asked to observe different slides using either the new adapter, the old adapter or a microscope without either and created a quick drawing of what they viewed. They then answered a survey addressing user experience, emotional and cognitive engagement.
Conclusion
Unfortunately there was no statistically significant difference between the two adapters
I analyzed the survey data using statistical software SPSS one-way ANOVA testing to determine whether there were significant differences between usability and engagement scores. Though the new adapter received higher usability scores than the original, the rating differences were not significant. I did, however, validate significantly higher ratings of engagement when using new and old adapters as compared to using a microscope by itself.
While the testing did not yield the significant outcomes I hoped for, I left with a better understanding of usability testing and determined a few ways to improve my testing methods in future studies.
Run additional tests with more complex tasks — one of the students mentioned they’d worked with the previous device before and that they thought the new version would only be more useful when performing tasks like like adjusting the microscope lenses. A more complicated task requiring participants to manipulate both adapters could have highlighted more differences while using them.
If time allows, recruit a larger sample size. I was careful not to over-recruit so I wouldn’t fill up time slots but several participants failed to show for testing and I realized it may have been better to over-recruit than under recruit.
When possible, recruit a more diverse sample size. Accommodating multiple phone sizes was one of the benefits of a larger platform, but the majority of users observed had smaller devices. Future testing could have compared the experiences of larger phone users and smaller phone users to see if there were differences in their experiences.


